5 Clever Ways to Turn Scrap Wood into a Space-Saving Shoe Rack
5 Clever Ways to Turn Scrap Wood into a Space-Saving Shoe Rack
- Introduction
- Creative Uses for Scrap Wood
- Design Ideas
- Step-by-Step Tutorial
- Common Mistakes
- FAQ
- Conclusion
Introduction
Have you ever found yourself tripping over shoes scattered around your entryway? The chaos of misplaced footwear can make a home feel cluttered and uninviting. If you have some scrap wood lying around, there’s a simple solution that not only clears up your space but also adds a touch of creativity to your décor. In this guide, you’ll discover how to transform leftover wood into a practical shoe rack that fits perfectly in your home.
Creative Uses for Scrap Wood
Before diving into the actual crafting, consider the myriad of ways you can repurpose scrap wood. Here are some strong ideas to inspire you:
- Garden planters: Use scrap wood to create charming planters.
- Wall art: Assemble pieces into unique art displays for your walls.
- Shelving units: Construct small shelves for added storage.
- Furniture accents: Add rustic touches to furniture items.
Each of these ideas showcases how versatile scrap wood can be, but let’s focus on the shoe rack project to make the best out of your extra materials.
Design Ideas
Your shoe rack can be as simple or as sophisticated as you like. Here are a few design inspirations:
- Multi-tiered rack: Build a structure with multiple levels to store more shoes efficiently.
- Wall-mounted version: Create an elevated rack to save floor space.
- Bench-style storage: Assemble a broader surface to sit on while putting on shoes.
Consider personalizing your shoe rack with paint or finishes to match your home’s style. Add hooks to hang bags or umbrellas, enhancing its functionality.
Step-by-Step Tutorial
Now, let’s walk through the steps to build your own space-saving shoe rack using scrap wood:
Materials Needed
- Scrap wood (various sizes)
- Screws and nails
- Sandpaper
- Wood glue
- Paint or wood finish (optional)
Detailed Steps
- Gather your scrap wood: Sort through your wood pieces to find suitable sizes.
- Plan your design: Sketch a simple layout of how your shoe rack will look.
- Cut the wood: Use a saw to cut the wood into the necessary lengths for shelves and supports.
- Sand the edges: Smooth out any rough edges to prevent splinters.
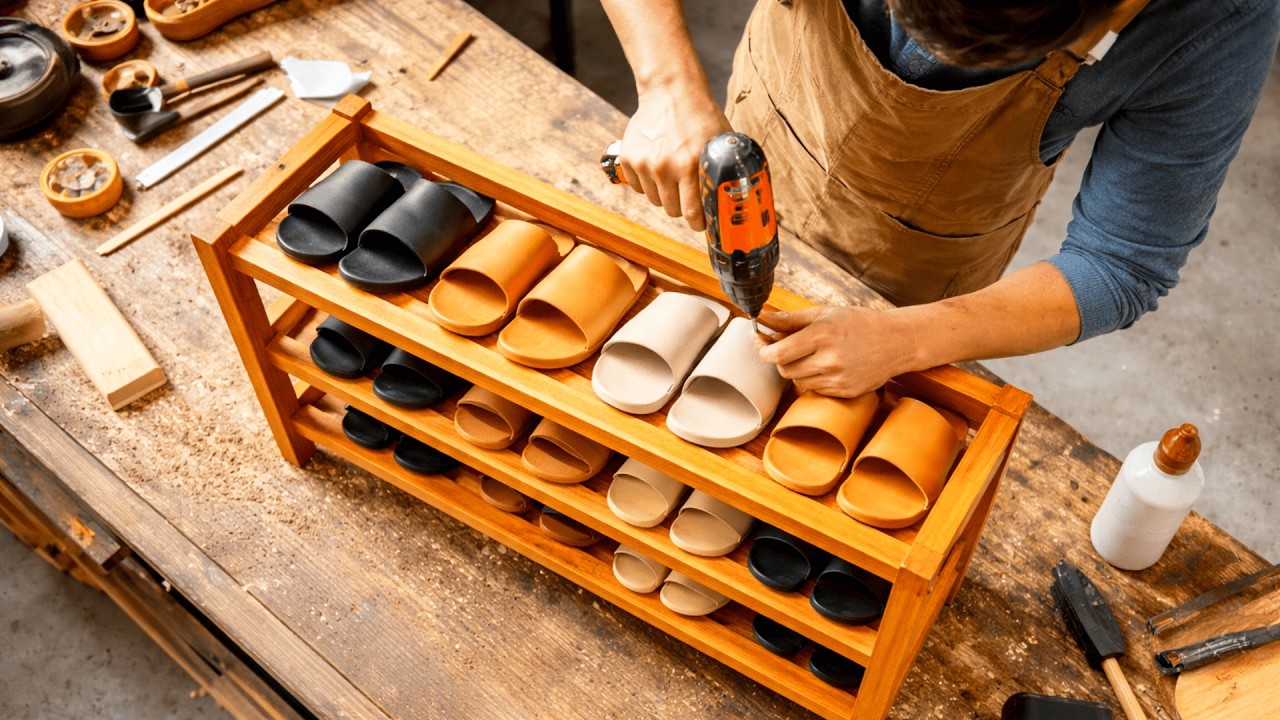
- Assemble the rack: Start by attaching the supports to the base, followed by the shelves.
- Secure everything: Use screws and nails to ensure stability.
- Finish your shoe rack: If desired, apply paint or a wood finish for a polished look.
Once you have completed these steps, let your new shoe rack dry thoroughly before placing your shoes on it.
Common Mistakes
When building a shoe rack from scrap wood, it’s easy to overlook some important considerations. Here are a few common mistakes to avoid:
- Using wood that is too weak: Ensure your scrap wood pieces are sturdy enough to hold weight.
- Neglecting measurements: Always measure your space and wood accurately to avoid fitting issues.
- Skipping the sanding process: Rough edges can ruin the appearance and safety of your project.
- Improper assembly: Use enough screws and glue for a stable structure.
FAQ
What type of wood is best for a shoe rack?
Hardwoods like oak or maple are ideal for stability, but softer woods can work if reinforced properly.
How much scrap wood do I need for a shoe rack?
The amount depends on your design, but a basic rack often requires 2-3 larger pieces for shelves and several smaller pieces for supports.
Can I paint or stain my shoe rack?
Yes, personalizing your shoe rack with paint or stain will enhance its overall look and protect the wood.
Conclusion
Creating a space-saving shoe rack from scrap wood not only helps you organize but also allows you to express your creativity. With careful planning and execution, you can turn leftover materials into a functional piece of furniture. What design ideas do you have in mind for your shoe rack? Share your thoughts in the comments!