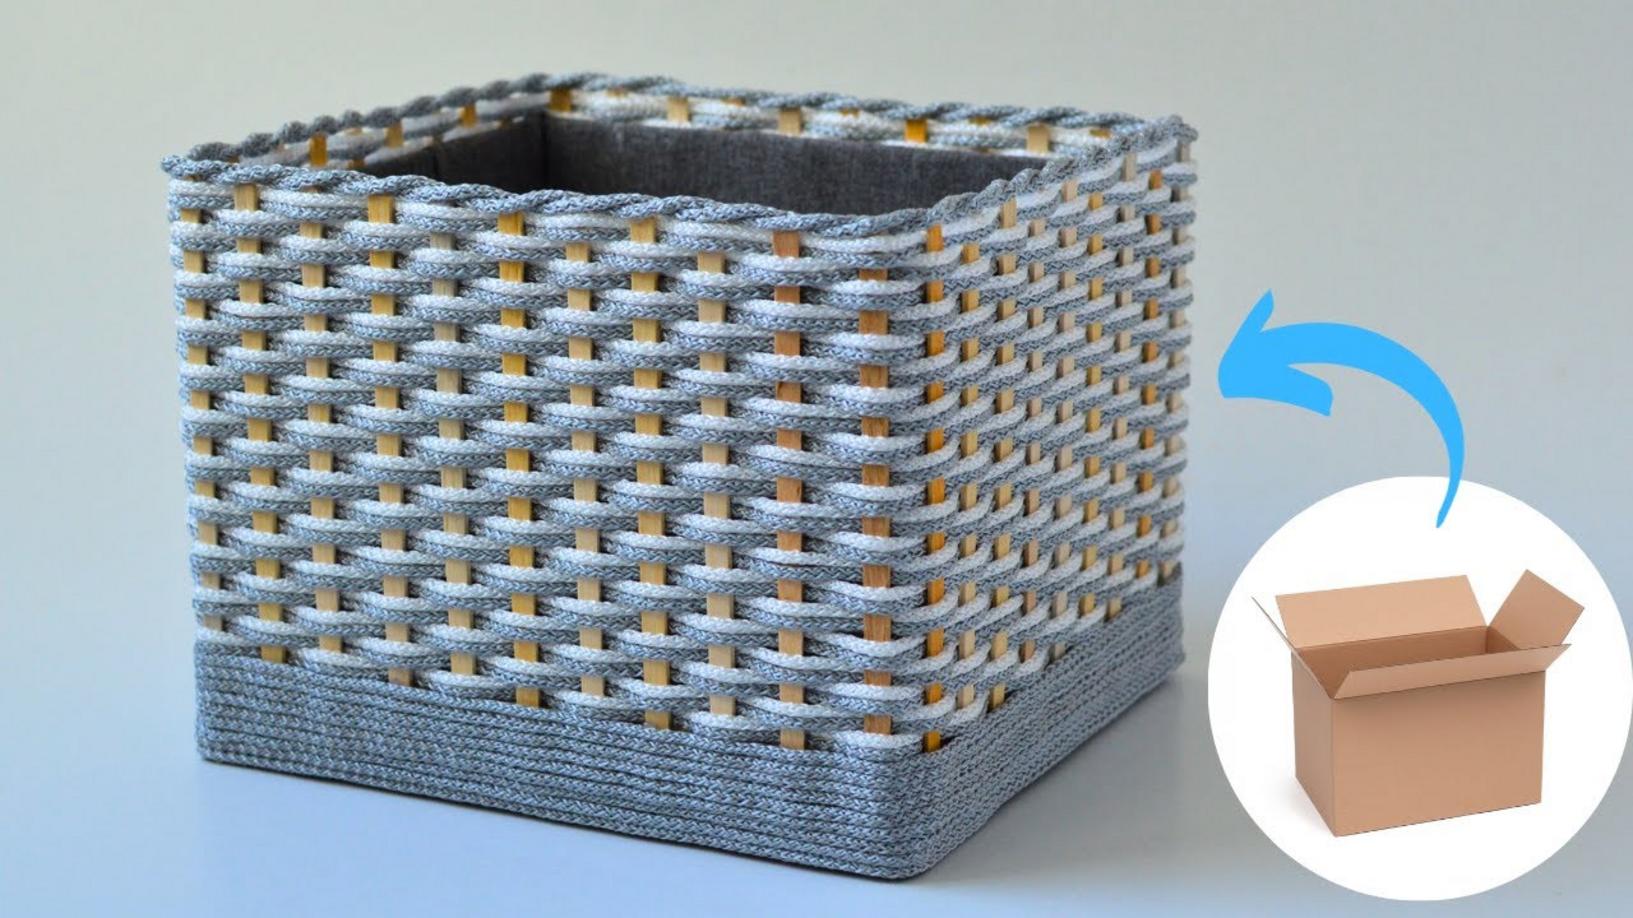
This simple method transforms a cardboard box into a stylish cord organizer…
This Simple Method Transforms a Cardboard Box into a Stylish Cord Organizer
Are you tired of tangled cords and messy spaces? **Transform a cardboard box** into a stylish and functional **cord organizer** in just a few simple steps. This DIY project not only rejuvenates your home but also helps you embrace the art of **recycling**. Let’s dive into how to create your very own cord organizer!
What You’ll Need
- Cardboard box
- Fabric cotton
- Transparent PET plastic sheet
- Synthetic cord (3 mm in diameter) or macrame rope
- Corrugated cardboard
- Wooden stirrers
- Hot glue gun and glue sticks
Step-by-Step Guide to Making Your Cord Organizer
Step 1: Prepare the Cardboard Box
Start by **selecting a cardboard box** that fits your storage needs. If you want, you can decorate it using **fabric cotton** to add a touch of style. Cut the box to your desired height if it’s too tall.
Step 2: Create Compartments with Corrugated Cardboard
Using strips of **corrugated cardboard**, create compartments inside the box. This will help to keep your cords organized and prevent tangling. Use a hot glue gun to secure the dividers in place.
Step 3: Cut the Transparent PET Plastic Sheet
Measure and cut your **transparent PET plastic sheet** to cover the sides of the compartments. This will not only serve as a visual barrier but also prevent dust from accumulating on your cords.
Step 4: Adding the Cords
Now, it’s time to add the cords! Use the **synthetic cord** or **macrame rope** to tie your cords neatly together. Arrange them in the compartments, ensuring that each cord is easily accessible.
Step 5: Secure the Top with Wooden Stirrers
To add a sturdy finish, glue **wooden stirrers** on top of the box. This will protect your cords and keep everything in place. Paint or decorate the stirrers to match your box for a cohesive look!
Practical Tips for a Successful Cord Organizer
- Choose a decorative fabric that matches your home’s decor.
- Use a label maker or handwrite labels for each compartment.
- Consider using patterned **cords** for added flair.
Common Mistakes to Avoid
- Not measuring the box correctly before cutting.
- Using too large or too small compartments.
- Rushing the glue application—allow each section to dry completely!
Conclusion: Get Creative with Your DIY Project!
Now that you know how to create a **stylish cord organizer** from a cardboard box, it’s time to get crafting! Gather your supplies and personalize your creation to fit your unique space. Remember, every step counts towards making your home tidier and more organized. So put on your crafting hat and **start transforming** your cords today!
Don’t forget to share your creations on social media! Tag us on Instagram and Facebook at @mimosa_decor for a chance to be featured. Embrace the beauty of recycling while injecting style and function into your home. Happy crafting!