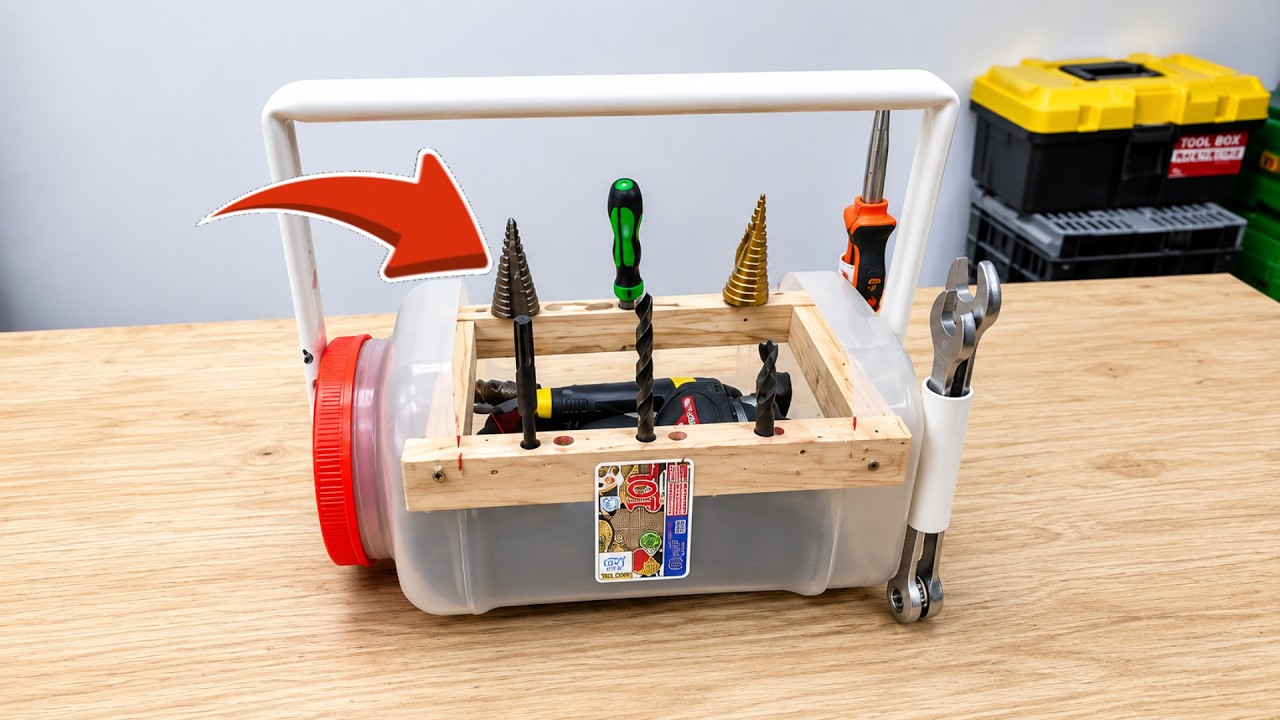
10 Easy Steps to Create a Portable DIY Tool Storage Box from Recycled Plastic
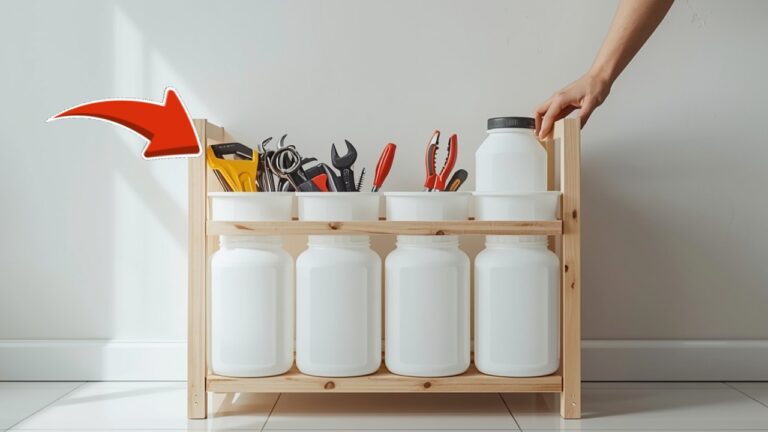
Creating a Portable DIY Tool Storage Box from Recycled Plastic
Required Materials
Having a cluttered workspace makes it challenging to focus on your projects. Misplacing tools and supplies can lead to frustration and wasted time. If you’ve ever searched for that one screwdriver or tape measure only to find it buried under a pile of items, you know how important effective storage is. Fortunately, with a bit of creativity and reused materials, you can create a sturdy, portable DIY tool storage box from recycled plastic. Keep reading to learn how.
Step-by-Step Instructions
Building your own portable DIY tool storage box from recycled plastic is both rewarding and practical. Here’s how to create your box in just a few steps.
Step 1: Gather Your Materials
- 1 empty plastic container with a secure lid (e.g., a large yogurt tub or a storage bin)
- 2-3 smaller containers to fit inside
- Strong adhesive or duct tape
- Marker for labeling
- Optional: paint or decorative tape for aesthetics
Step 2: Prepare the Container
- Clean the plastic container thoroughly, removing any labels or residue.
- Ensure it has a tight-fitting lid to keep your tools secure and dust-free.
Step 3: Create Dividers
To keep tools organized, consider creating dividers using the smaller containers. Here’s how to do it:
- Place one or two smaller containers inside the larger one to act as dividers.
- Use strong adhesive or duct tape to secure them in place.
Step 4: Decorate Your Box
Make your tool storage box uniquely yours by decorating it:
- Use paint to cover the exterior of the container.
- Add labels with a marker to identify the tools stored inside.
- Consider using decorative tape for a fun touch.
Personalization Ideas
Customizing your DIY tool storage box can enhance its functionality and style. Here are some ideas to make it truly yours.
Add Color and Patterns
- Use bright colors to make your box stand out in your workspace.
- Experiment with patterns, like stripes or polka dots, to add a personal touch.
Incorporate a Handle
If you’d like to make your tool box even more portable, consider adding a handle:
- Cut two pieces of sturdy fabric or rope, about 12 inches long.
- Attach each end to the sides of the box using strong adhesive.
Include a Compartment for Extra Supplies
Using small plastic containers inside your larger storage box allows you to keep supplies organized:
- Use one for screws and nails, another for tools like wrenches or pliers.
- Label each container for easy access.
Common Mistakes to Avoid
When creating your portable DIY tool storage box, it’s essential to avoid some common pitfalls that could impact its effectiveness.
1. Not Securing the Lid Properly
Ensure the lid fits tightly to prevent tools from falling out or getting dust inside.
2. Overloading the Container
Avoid filling the box with too many tools, as this can make it unwieldy and challenging to carry.
3. Forgetting to Label
Without labels, it can be difficult to find the tools you need quickly. Make sure to label everything.
FAQ
What types of recycled plastic can I use for the storage box?
You can use any sturdy plastic container, such as those from food storage or cleaning supplies, as long as it has a secure lid.
Can I decorate my tool storage box safely?
Yes, use non-toxic paint or decorative materials that are safe for household use to ensure both safety and style.
How can I ensure my tool storage box lasts a long time?
Choose durable containers and avoid overloading them. Regularly clean your box to maintain its best condition.
Conclusion
Creating a portable DIY tool storage box from recycled plastic not only organizes your tools effectively but also gives you a chance to express your creativity. Have you tried making your own storage solutions? Share your experiences and tips in the comments below!