Transform a Broken Water Pipe: 5 Steps to Create a DIY Rust Grinding Tool
Transform Your Broken Water Pipe into a DIY Rust Grinding Tool
Introduction
Dealing with a broken water pipe can be a frustrating experience, especially when it gets rusty and corroded. You might find yourself staring at that old pipe, wondering how to give it new life instead of tossing it away. Transforming it into a DIY rust grinding tool not only helps you reuse materials but also empowers you to tackle home projects efficiently. Curious about how to turn that broken piece into something functional? Read on to discover the details!
Required Materials
Before diving into the transformation, gather the necessary supplies. Having everything on hand will make your project smoother and more enjoyable.
- Broken water pipe (ensure it’s clean and free of debris)
- Grinding wheel
- Protective eyewear
- Sandpaper (different grits)
- Drill and drill bits
Step-by-Step Instructions
Follow these simple steps to create your DIY rust grinding tool from the broken pipe.
1. Prepare the Pipe
- Clean the broken water pipe thoroughly to remove any dirt or rust flakes.
- Measure the length you need for your grinding tool and mark it with a pencil.
- Cut the pipe using a hacksaw or pipe cutter based on your measurements.
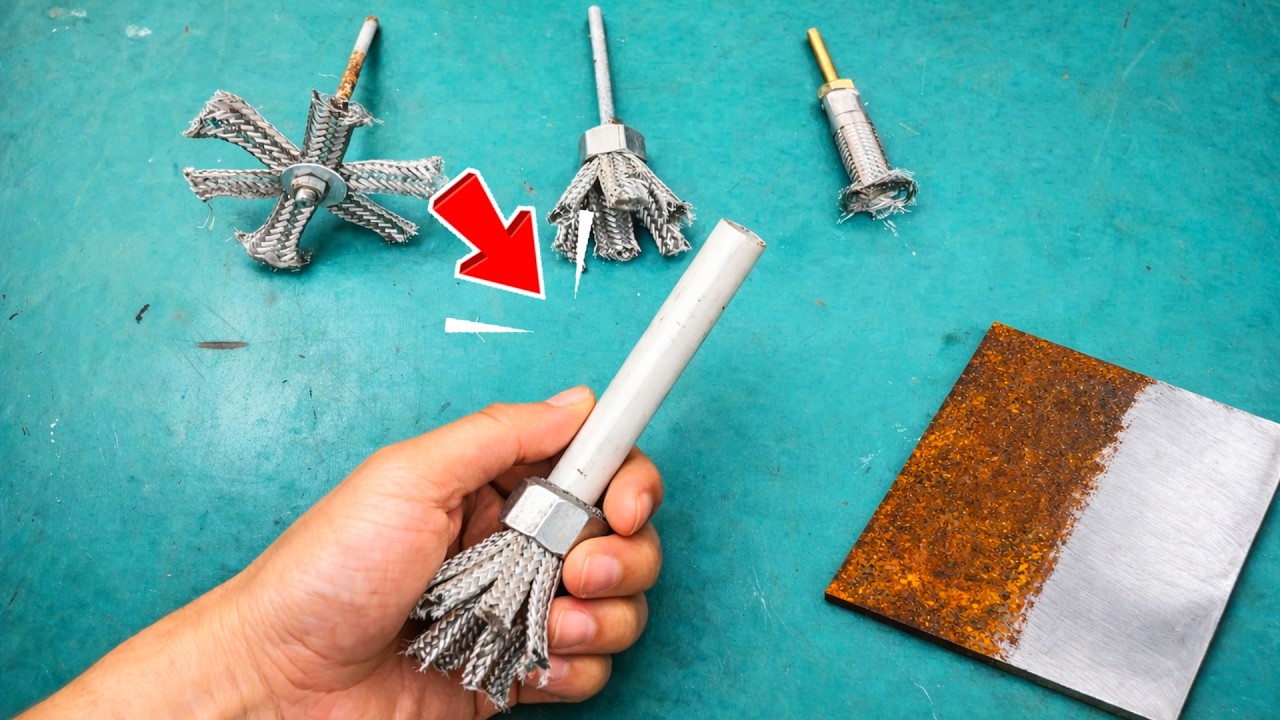
2. Attach the Grinding Wheel
Your next task is to attach the grinding wheel to fit securely within the pipe.
- Choose an appropriate grinding wheel size that fits snugly into the pipe’s interior.
- Drill a hole through the side of the pipe to secure the wheel using bolts.
- Insert the grinding wheel and use nuts to fasten it securely.
3. Sand the Edges
Smoothing out the edges is crucial for safe handling and optimal performance.
- Use coarse sandpaper on the outside edges of the cut pipe.
- Progress to medium and then fine sandpaper to achieve a smooth finish.
4. Safety Precautions
Always prioritize safety while working on your DIY project.
- Wear protective eyewear to shield your eyes from debris.
- Keep a stable grip on the tool while grinding.
Common Mistakes to Avoid
Before you embark on your DIY project, avoid these common pitfalls to ensure a successful transformation.
- Neglecting to clean the pipe, which can hinder the effectiveness of the grinding tool.
- Using a grinding wheel that is too large or too small for your pipe.
- Failing to secure the grinding wheel properly, risking breaks during use.
FAQ
Can I use any type of pipe for this project?
While it’s best to use metal pipes for durability, you can also experiment with PVC pipes, but ensure they can withstand grinding activities.
How long will the DIY rust grinding tool last?
The lifespan depends on the pipe’s material and usage frequency; regular maintenance can help extend its life.
What safety gear do I need when using the tool?
Always wear protective eyewear and suitable gloves to shield yourself from flying debris and sharp edges.
Conclusion
Turning a broken water pipe into a DIY rust grinding tool is both a creative and practical solution. By following the steps outlined, you can successfully repurpose materials while enhancing your tool collection. Have you ever tackled a similar project? Share your experiences and suggestions in the comments below!