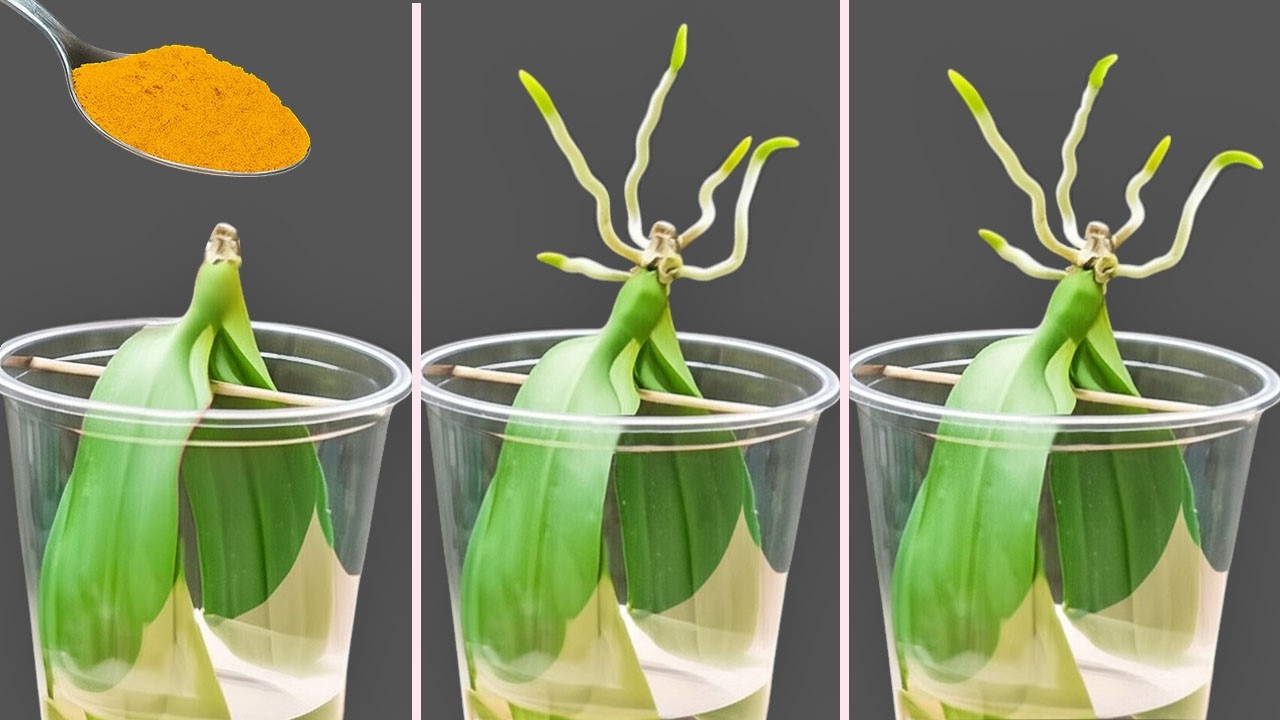
Grow 7 Roots in Water: The New Orchid Leaf Method You Need to Try!
Grow 7 Roots in Water Using the Orchid Leaf Method
- Introduction
- Water Propagation Basics
- Choosing the Right Water
- Nurturing Your Roots
- Common Mistakes to Avoid
- FAQ
- Conclusion
Introduction
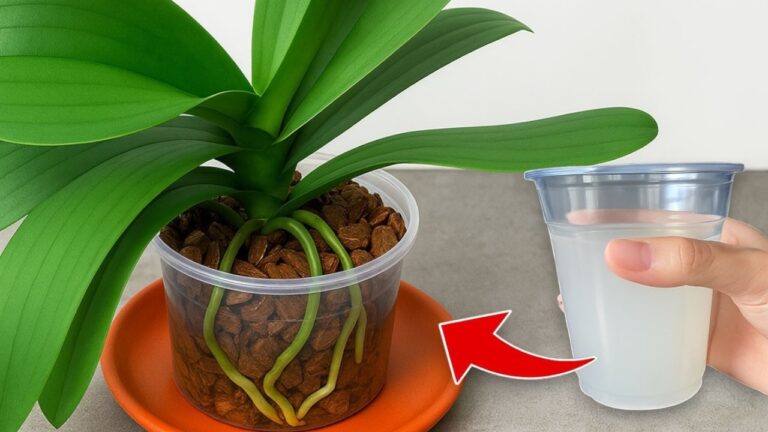
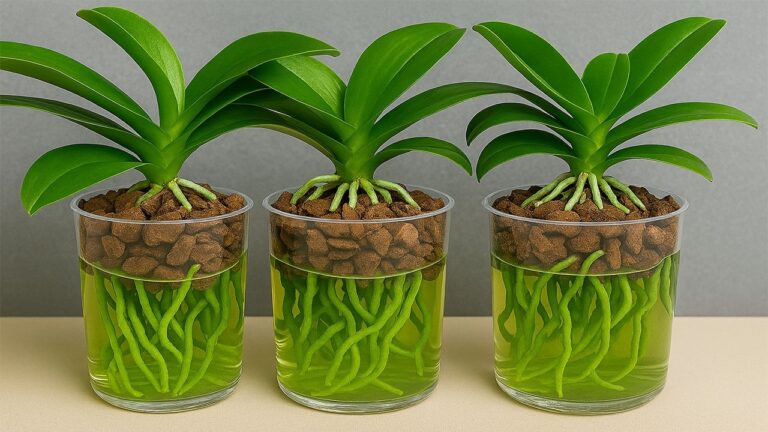
Have you ever noticed how some plants thrive in water while others seem to struggle? The beauty of plants like orchids lies not just in their flowers, but in their ability to propagate successfully. If you’re looking to expand your plant collection or rejuvenate some tired roots, utilizing the Orchid Leaf Method is an effective strategy that many plant lovers swear by. This technique allows you to grow roots efficiently and can breathe new life into your indoor garden. Let’s delve into how you can successfully implement this method at home.
Water Propagation Basics
Understanding the fundamentals of water propagation is crucial for success. This method involves placing plant cuttings in water to encourage root growth. Here’s how you can effectively start this process:
1. Select Your Plants
Choose healthy plants for propagation. Some ideal candidates include:
- Orchids
- Succulents
- Herbs like basil and mint
- Houseplants such as pothos and spider plants
2. Prepare Your Cuttings
Follow these steps to prepare your cuttings:
- Take a sharp, sterilized knife or scissors to cut a healthy stem or leaf from the parent plant.
- Remove any lower leaves that might sit below the waterline to prevent rot.
- Place your cuttings in a clear container, allowing you to monitor their progress.
Choosing the Right Water
The type of water you use can significantly impact root growth. Here’s how to choose wisely:
Types of Water
While some may prefer tap water, there are better options:
- Distilled water: Helps avoid chlorine and other chemicals found in tap water.
- Rainwater: A natural option packed with nutrients.
- Filtered water: Removes impurities and is gentle on your plants.
Water Temperature
Consider the temperature of your water:
- Use room temperature water to avoid shocking your cuttings.
- Change the water weekly to keep it fresh and oxygenated.
Nurturing Your Roots
Once you have set up your cuttings, it’s important to care for them to encourage strong root development:
1. Light Requirements
Place your container in indirect sunlight, as direct light can hinder root growth or scorch the leaves.
2. Fertilization
After a few weeks, you can introduce nutrients:
- Use a diluted liquid fertilizer every month to promote healthy root growth.
- Avoid over-fertilizing, as it can damage young roots.
Common Mistakes to Avoid
To increase your chances of success, be aware of these common pitfalls:
Mistake 1: Using Contaminated Tools
Not sterilizing cutting tools can introduce disease to the new cuttings.
Mistake 2: Neglecting Water Changes
Stagnant water can lead to algae growth and root rot. Change water weekly.
Mistake 3: Overcrowding Cuttings
Attempting to root too many cuttings in one container can lead to competition for nutrients and space.
Mistake 4: Insufficient Light
Using direct sunlight can dazzle and burn delicate leaves. Stick to indirect light.
FAQ
How long does it take for plant cuttings to root in water?
Typically, it can take anywhere from a few weeks to a couple of months for cuttings to develop roots, depending on the plant type and conditions.
Can I use tap water for my cuttings?
While you can use tap water, it’s advisable to let it sit out for 24 hours to allow chlorine to dissipate, or better yet, use distilled or rainwater.
What signs indicate my cuttings are healthy?
Healthy cuttings will show signs of new growth, vibrant color, and roots that develop a few centimeters long.
Conclusion
Using the Orchid Leaf Method to grow roots in water can be a rewarding experience that enhances your gardening skills. By focusing on proper plant selection, water choices, and nurturing techniques, you can successfully propagate a variety of plants. Have you tried water propagation before, and what plants would you like to grow next?