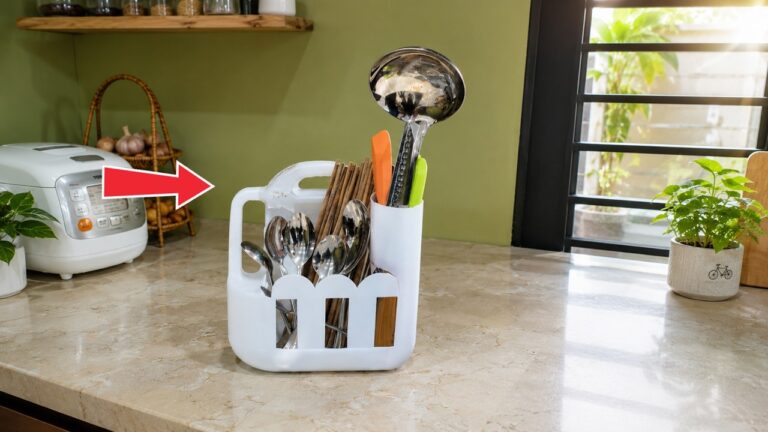
Transform 1 Plastic Box into a Stylish DIY Dish Rack Organizer for Your Kitchen
Transform a Plastic Box into a Stylish DIY Dish Rack Organizer for Your Kitchen
- Required Materials
- Step-by-Step Guide
- Creative Options for Personalization
- Common Mistakes to Avoid
- FAQ
Picture this: your kitchen counter is cluttered with wet dishes, and you’re struggling to find a place for everything after washing. A chaotic kitchen can make meal prep feel overwhelming, and finding a practical yet stylish solution is essential. Transforming a simple plastic box into a functional dish rack organizer might be just what you need to restore some order and elegance to your kitchen space. Let’s explore how you can easily create this handy kitchen accessory.
Required Materials
Before diving into the transformation process, it’s essential to gather the right materials. Here’s what you’ll need:
- 1 plastic box (any size, but medium works best)
- Sandpaper or a sanding block
- Acrylic paint or spray paint
- Paintbrush (if using acrylic paint)
- Clear sealant (optional for added durability)
- Decorative elements (e.g., stencils, washi tape, or faux greenery)
Step-by-Step Guide
Now that you have your materials ready, let’s get to the fun part – transforming your plastic box into a chic dish rack organizer!
- Prep the box: Start by cleaning your plastic box thoroughly. Make sure there’s no dirt or residue.
- Smooth the surface: Use sandpaper to gently roughen the surface of the box, making it easier for paint to adhere. Be sure to wipe away any dust afterward.
- Paint the box: Apply your chosen paint using a paintbrush or spray paint. Aim for an even coat and allow it to dry completely. If you want a second coat, wait for the first one to dry before applying it.
- Add sealant: If you’d like, you can apply a clear sealant to enhance durability, especially if the dish rack will be near water.
- Decorate the box: Once the paint is dry, personalize your dish rack organizer with decorative elements such as stencils or faux greenery. This step gives your project a unique touch.
Creative Options for Personalization
Looking to make your dish rack even more unique? Here are some creative ideas you might consider:
- Color schemes: Match the paint color to your kitchen theme or use multiple shades for a vibrant look.
- Stenciled patterns: Use stencils to create geometric or floral designs that can add a stylish flair.
- Integrated storage: If your plastic box has a lid, consider using it as an additional flat surface for spices or dishwashing soap.
Common Mistakes to Avoid
While transforming a plastic box into a dish rack may seem straightforward, there are a few common pitfalls to watch out for:
- Skipping prep work: Failing to clean and sand the plastic surface can result in paint that peels or bubbles.
- Rushing the drying process: Make sure each coat of paint is fully dry before applying another; this will improve the overall finish.
- Choosing the wrong paint: Use acrylic or spray paint specifically designed for plastic to ensure good adhesion and durability.
FAQ
Can I use a larger plastic box for a bigger dish rack?
Yes, a larger plastic box can work well. Just make sure it fits comfortably in your kitchen space.
How can I clean the dish rack once it’s made?
Wipe it down with a damp cloth and avoid abrasive cleaners that could scratch the paint.
Is the dish rack waterproof?
Your dish rack will be resistant to water if sealed properly. Just ensure it’s not soaked continuously.
This project not only declutters your counter space but also adds a personal touch to your kitchen. By transforming a simple plastic box into a stylish DIY dish rack organizer, you gain both functionality and aesthetic appeal. What creative elements would you add to your dish rack? Share your ideas in the comments!