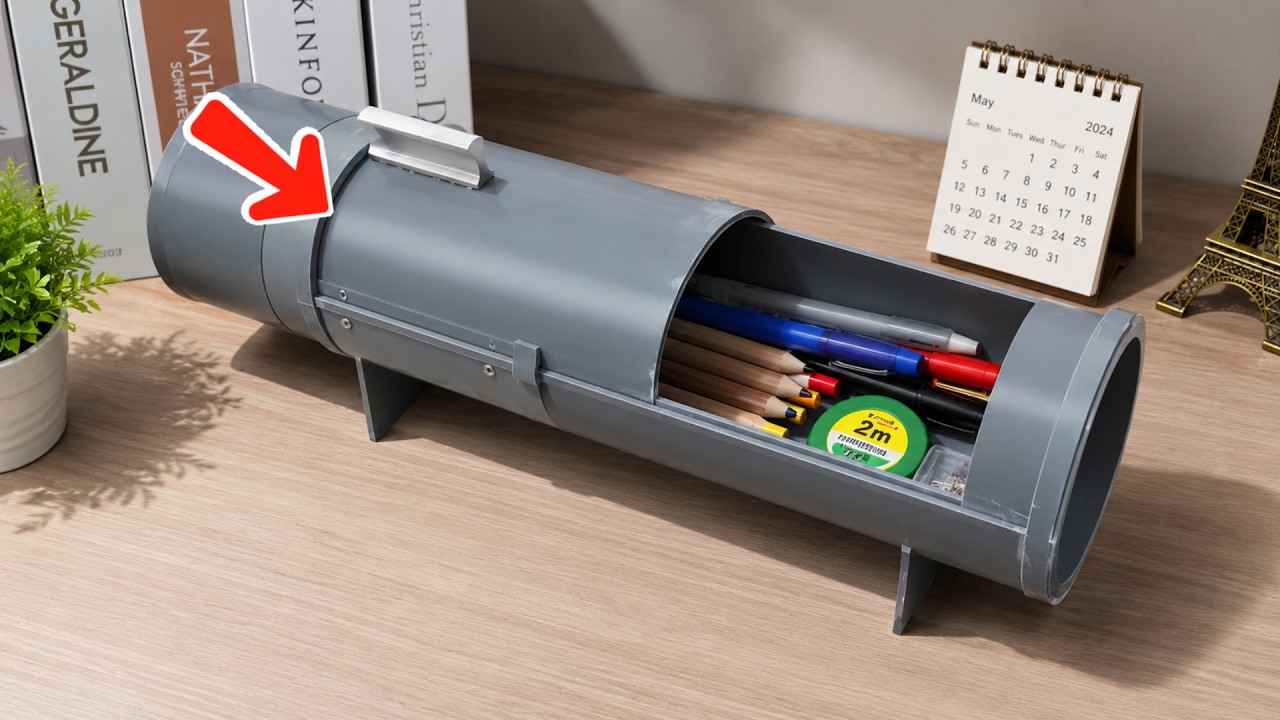
5 Easy Steps to Transform PVC Pipe into a Handy Tool Storage Box
Transform PVC Pipe into a Handy Tool Storage Box
Introduction
Picture yourself in the garage, surrounded by an assortment of tools scattered around, making it difficult to find what you need. Without a proper storage solution, it can feel overwhelming and frustrating to tackle any home improvement project. Luckily, there is a simple yet effective way to organize your tools using materials you might already have at home. Let’s explore how to turn PVC pipes into a functional and stylish tool storage box that will keep everything in its place.
Required Materials
To get started on creating your PVC tool storage box, gather these essential materials:
- 3-4 pieces of PVC pipe (lengths depend on your design)
- 1 medium-sized container or storage bin
- Utility knife or saw for cutting the pipes
- Measuring tape for accuracy
- Sandpaper to smooth the edges
- Super glue or PVC adhesive
- Decorative paint or stickers (optional)
Step-by-Step Guide
This practical guide will walk you through the process of making your own tool storage box from PVC pipe.
Step 1: Measure and Cut the PVC Pipe
First, decide on the dimensions of your tool storage box based on the tools you plan to store. Use your measuring tape to determine the lengths you need.
- Measure the desired length for each section of your storage box.
- Cut the PVC pipe into pieces according to your measurements.
- Sand the edges to prevent sharp fragments.
Step 2: Design Your Storage Layout
Before assembling, sketch out a simple plan to visualize how the pieces will fit together.
- Consider creating sections for different sizes or types of tools.
- Think about stacking the pipes or arranging them in a row.
Step 3: Assemble the Storage Box
Once your PVC pieces are ready, it’s time to put them together. Use the super glue or PVC adhesive to secure the pieces.
- Arrange your cut pieces according to your layout.
- Apply the adhesive at the joints of the pipes.
- Hold them in place for a few moments until they set.
Step 4: Personalize Your Storage Box
Make your tool storage box uniquely yours with some personal touches.
- Paint the exterior with colors that match your style.
- Add stickers for label identification of each section.
Step 5: Organize and Enjoy
After the box is complete, place it in your garage or workspace.
- Sort your tools according to size or type and place them in the box.
- Check for easy access to your tools when needed.
Mistakes to Avoid
As with any DIY project, there are common pitfalls to be aware of:
- Using the wrong size PVC pipe can lead to insufficient storage space.
- Neglecting to sand the edges may cause injuries when reaching for tools.
- Forgetting to allow the adhesive to cure properly can compromise the box’s stability.
- Skipping the personalization step can make your box less enjoyable to use.
FAQ
What tools can I store in a PVC pipe tool storage box?
You can store a variety of tools, such as wrenches, screwdrivers, and small power tools, depending on the size of your PVC sections.
Can I customize the size of the storage box?
Yes, you can adjust the lengths of the PVC pipes to create a box that suits your specific needs and available space.
How long does it take for the adhesive to set?
The drying time for PVC adhesive varies, but typically it takes about 24 hours to fully cure. Be sure to check the instructions on your specific adhesive for best results.
Conclusion
Creating a handy tool storage box from PVC pipe can simplify your workspace and help you find your tools easily. With a few simple steps, you can not only organize your tools but also infuse a bit of creativity into your garage. How do you currently store your tools, and what changes do you plan to make for better organization?