Fix Your Broken Charging Cable in 5 Easy Steps and Save Money Today!
Repair Your Broken Charging Cable in 5 Simple Steps
Introduction
It’s frustrating when your phone or tablet doesn’t charge, especially when you need it the most. Often, the issue lies with the charging cable itself, which can develop wear and tear over time. Instead of rushing out to buy a new one, consider repairing your existing cable. Repairing not only saves you money but also helps reduce waste, making it an eco-friendly choice. Let’s explore how you can tackle this task with ease.
Required Materials
Before you dive into the repair process, gather the necessary materials you’ll need. Here’s a list to guide you:
- Scissors or wire cutters
- Electrical tape
- Heat shrink tubing (optional)
- A small screwdriver (if the plug is detachable)
- Multimeter (to test voltage)
Step-by-Step Guide
Now that you have your materials ready, follow these simple steps to repair your broken charging cable.
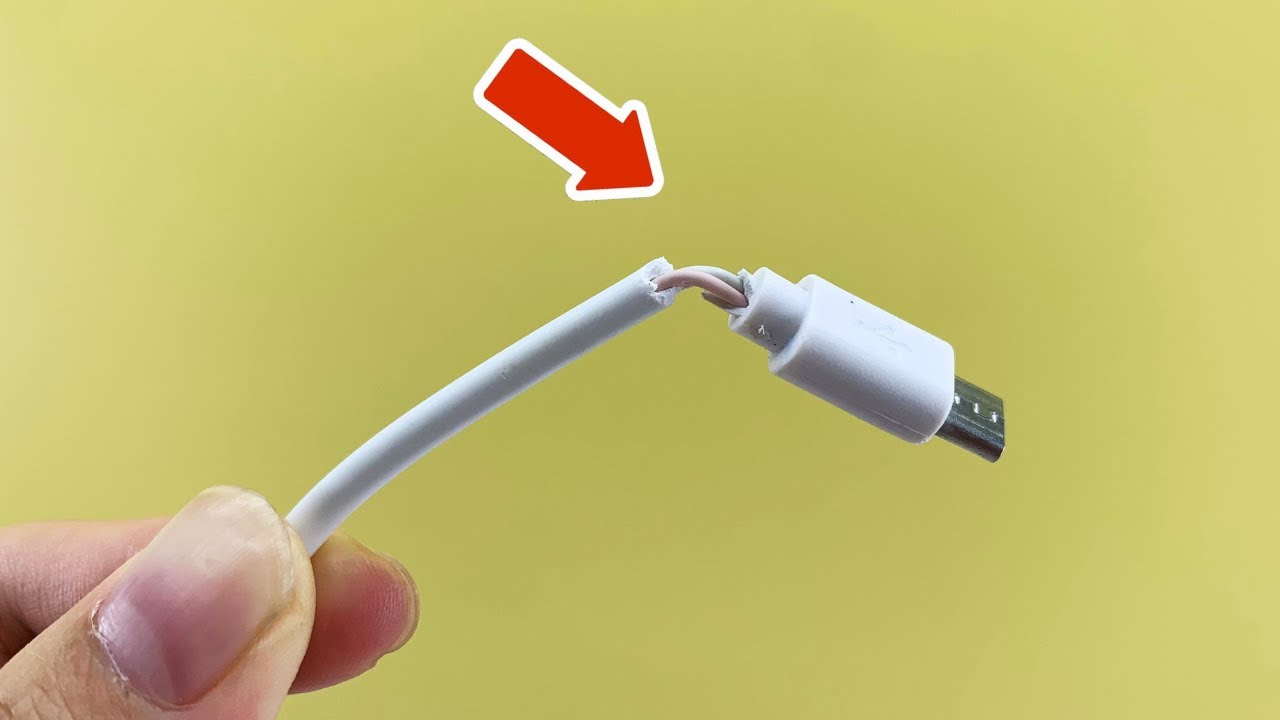
1. Inspect the Cable
Start by examining your cable closely. Look for any visible signs of damage, such as:
- Frayed wires
- Broken plug connections
- Cracks in the insulation
2. Cut the Damaged Section
If you find frayed parts, cut them out carefully using scissors or wire cutters. Make sure you cut at least an inch beyond the damaged area to ensure a clean repair.
3. Strip the Wires
Once you’ve cut out the damaged section, you need to strip the insulation from the ends of the wires you’ve exposed. This will reveal the copper wires inside.
- Use a wire stripper or scissors carefully.
- Expose about half an inch of copper for a solid connection.
4. Connect the Wires
Next, it’s time to connect the wires. Match the colors of the wires (usually, there are red and black or green wires). Twist them together securely and cover with electrical tape. If you have heat shrink tubing, slip it over the connection before connecting the wires, and then shrink it using a heat source.
5. Test Your Repair
To ensure your repair was successful, test the cable using a multimeter. Set it to the appropriate voltage setting. If you are getting the correct readings, your cable repair is likely successful. If not, revisit your connections.
Common Mistakes to Avoid
Even simple tasks can have their pitfalls. Here are some mistakes people often make while repairing their charging cables:
- Overcutting the cable, which can remove too much usable length.
- Failing to match wire colors properly, leading to potential short circuits.
- Neglecting to use heat shrink tubing for additional protection.
- Not testing the connections before relying on the repaired cable.
- Using too much electrical tape, which may cause inefficiencies in the cable’s flexibility.
FAQ
Can I repair any type of charging cable?
Yes, most charging cables can be repaired, but the difficulty of the repair can vary based on the cable type and damage extent.
What should I do if my cable continues to fail?
If your cable continues to have issues after repair, it may be time to replace it, as repeated repairs may not be reliable.
Is this repair safe to do myself?
Yes, it’s generally safe to repair cables as long as you take caution and follow proper steps. If you’re uncertain, consider consulting a professional.
Conclusion
Repairing your broken charging cable is a practical way to save money and contribute to sustainability. By following these steps, you can extend the life of your cable and keep your devices powered. Have you ever tried repairing a cable, and what other DIY projects do you enjoy? Share your thoughts in the comments!