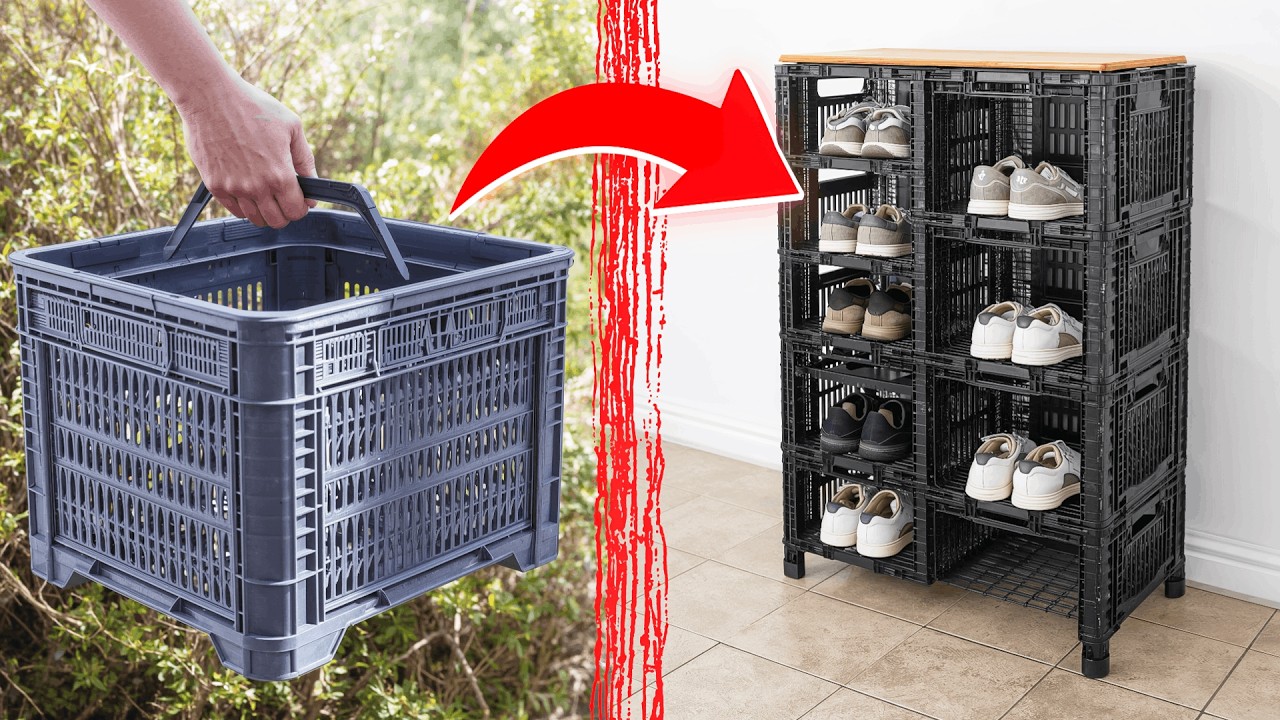
Transform 5 Old Plastic Crates into a Handy Shelf in Just 2 Minutes! Discover How!
Transform Old Plastic Crates into a Handy Shelf in Just 2 Minutes
- Introduction
- Required Materials
- Step-by-Step Process
- Practical Tips for Success
- Common Mistakes to Avoid
- FAQ
- Conclusion
Introduction
Many of us have old plastic crates lying around that we no longer use. Instead of tossing them in the trash, consider giving them a new life as a stylish and functional shelf. This eco-friendly project is simple, quick, and doesn’t require any special tools. In just a few minutes, you can create a practical storage solution that adds a touch of charm to your home. Keep reading to discover how to transform those crates into something useful.
Required Materials
Before diving into this project, ensure you have the following materials at hand:
- Old plastic crates (5 or more)
- Strong adhesive or zip ties
- Scissors (if using zip ties)
- Sandpaper (optional, for smoothing edges)
Step-by-Step Process
Creating your shelf from plastic crates is straightforward. Follow these steps for a quick transformation:
- Gather your plastic crates and decide on the layout. Stacking them vertically or horizontally will change the shelf’s look.
- Position the crates in your desired arrangement. Ensure they are stable and secure.
- Attach the crates using your chosen method. If you’re using adhesive, apply it generously where the crates touch. Alternatively, use zip ties to fasten them together for a more temporary solution.
- If desired, sand the edges of the crates to protect against sharp spots.
- Style your new shelf by adding books, plants, or decorative items that reflect your personality.
Practical Tips for Success
Here are some additional tips to ensure your plastic crate shelf turns out beautifully:
Personalizing Your Crates
Consider painting or decorating your crates to match your home decor. Use non-toxic spray paint or washable markers for a fun touch.
Choosing the Right Location
Find a spot in your home where the shelf can be both practical and a statement piece. Areas like the living room, kitchen, or garage are great choices.
Maximizing Space
Use baskets or small containers to keep your items organized within the crates. This will make everything look tidier and more appealing.
Common Mistakes to Avoid
As you embark on this project, be mindful of these common pitfalls:
- Not cleaning the crates before use. Dust and residues may prevent adhesives from sticking properly.
- Overloading the crates with too many heavy items, which can lead to instability.
- Ignoring the edges; rough edges can detract from the overall look and safety.
- Choosing a cluttered area for placement, which can overshadow your neat creation.
- Neglecting to consider the weight distribution when stacking crates.
FAQ
Can I use different sized crates? Yes, mixing various sizes can create a unique and interesting aesthetic.
What if the crates are damaged? You can still use slightly damaged crates; just ensure that they are safe enough to hold items.
Is this shelf suitable for outdoor use? While plastic is weather-resistant, consider UV exposure and a sturdy base if placing it outside.
Conclusion
Transforming old plastic crates into a handy shelf is a quick and fulfilling project that enhances your home while promoting recycling. Personalize your creation to add character and functionality to your space. What unique items will you showcase on your new shelf? Share your thoughts in the comments below!