5 Simple Steps to Transform a Plastic Box into a Tool Organizer
5 Steps to Transform a Plastic Box into a Handy Tool Organizer
Many of us have a stash of tools that seem to multiply while taking over our spaces, leaving us frustrated and time-strapped when we’re searching for that specific screwdriver or paintbrush. You might find yourself scrambling to locate what you need in a jumbled collection. The good news is that you can create a simple and effective storage solution without needing to buy any fancy organizers. Read on to learn how to transform a plastic box into a handy tool organizer.
Tools and Materials
To get started on your DIY tool organizer, gather the following items:
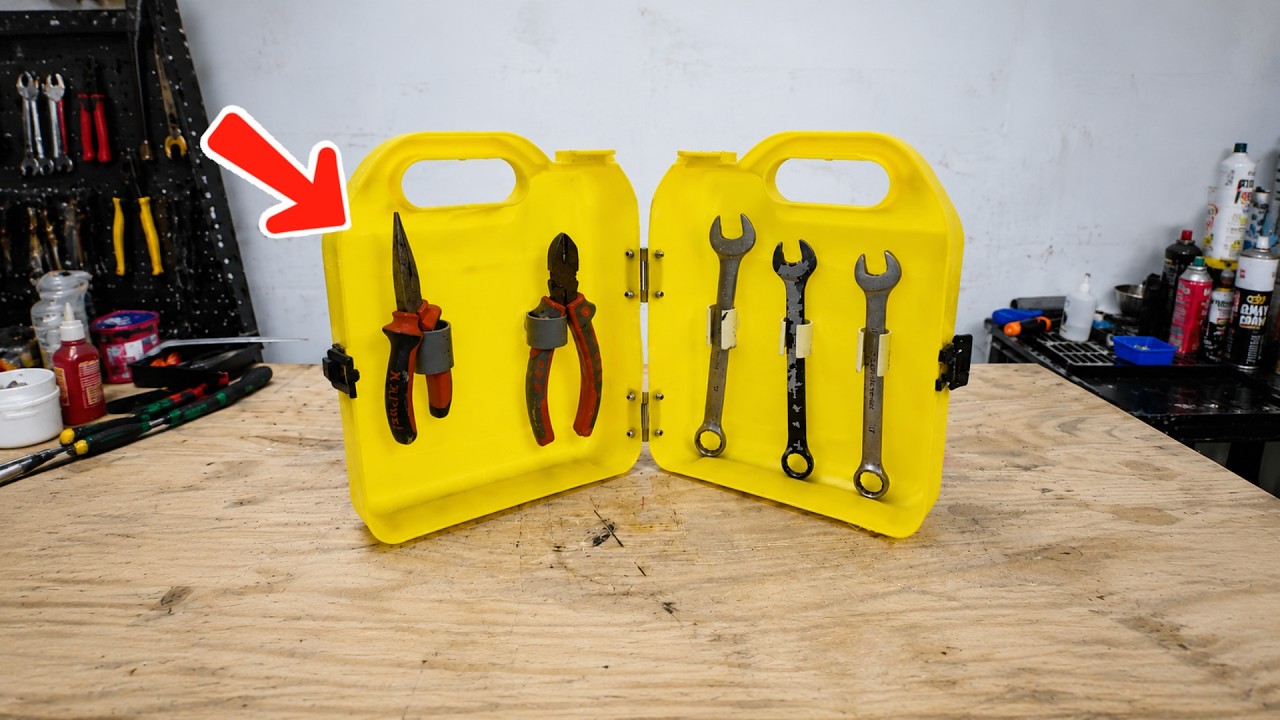
- Plastic box: Choose a size that fits your tools comfortably.
- Dividers: You can use cardboard or plastic dividers to create sections.
- Scissors: To cut your dividers to the right size.
- Label maker or tape and marker: For identifying tool sections.
- Sandpaper (optional): To smooth any rough edges if you’re using wood dividers.
Preparing the Plastic Box
Your first step is to prepare the plastic box so it can effectively serve as an organizer.
1. Clean the Box
Make sure to clean your plastic box thoroughly, removing any dust or debris. A clean surface is essential for proper organizing.
2. Choose the Right Layout
Think about the types of tools you need to store and plan a layout. You might want categories like hand tools, power tools, or painting supplies. Sketch your layout on paper if that helps.
3. Cut and Insert Dividers
Using your scissors, cut your dividers to fit into the box according to your chosen layout and simply place them inside. This will help separate different tools and keep your box tidy.
Organizing Your Tools
Now it’s time to arrange your tools within the prepared box. Here are a few helpful tips to keep things structured:
1. Group Similar Items
When organizing, place similar items together. For example, put all screwdrivers in one section and all paintbrushes in another. This method makes it easier to find what you need.
2. Use Labels
Labeling each section will save you time when you’re on the hunt for specific tools. You can use a label maker or simply tape and a permanent marker to create easy-to-read labels.
3. Regular Maintenance
Make it a habit to check your organizer regularly. This way, you can ensure everything is in its designated spot and replace items as needed.
Common Mistakes to Avoid
Here are a few pitfalls to watch out for when transforming your plastic box into a tool organizer:
- Overcrowding the Box: Avoid the temptation to cram in too many tools, which can make finding items difficult.
- Ignoring Size Differences: Ensure your dividers account for various tool sizes; mismatched sizes can lead to confusion.
- Neglecting Visibility: Keep your tools visible by arranging them in a way that you can see everything at a glance; cluttered sections can lead to frustration.
FAQ
1. What types of tools work best in a plastic box organizer?
Hand tools, paintbrushes, and smaller power tools are ideal for this kind of organization.
2. Can I use other types of boxes?
Absolutely! Any sturdy container can work, but ensure it’s durable enough to hold your tools.
3. How often should I reorganize my tool box?
Try to reassess your organization every few months, especially after big projects or tool additions.
Transforming a plastic box into a tool organizer is a straightforward process that can lead to a more functional workspace. By following the steps outlined, you’ll create a system that saves time and enhances your DIY experience. What tools do you find hardest to organize? Feel free to share your thoughts in the comments!