10 Fast Tips to Propagate Orchids Using Floral Foam for a Thriving Garden
Quick Tips for Propagating Orchids in Your Garden
- Introduction
- Essential Tips for Orchid Propagation
- Common Mistakes When Propagating Orchids
- FAQ
- Conclusion
Introduction
Orchids are a stunning addition to any garden, but their propagation can often feel challenging. Whether you’re a novice gardener or have some experience, you might be unsure about the best approach to growing new plants from your existing ones. Floral foam can simplify this process, offering an effective medium for orchid propagation. Understanding the nuances of this technique can help you cultivate a thriving garden filled with beautiful blooms. Read on to discover practical tips that can enhance your orchid propagation journey.
Essential Tips for Orchid Propagation
When propagating orchids using floral foam, there are several key strategies to implement that can pave the way for success.
1. Choose the Right Orchid Variety
Some orchid varieties are more suitable for propagation than others. Consider starting with:
- Phalaenopsis orchids, which are easy to propagate.
- Cattleya orchids, known for their vibrant flowers.
- Dendrobium orchids, which thrive in various conditions.
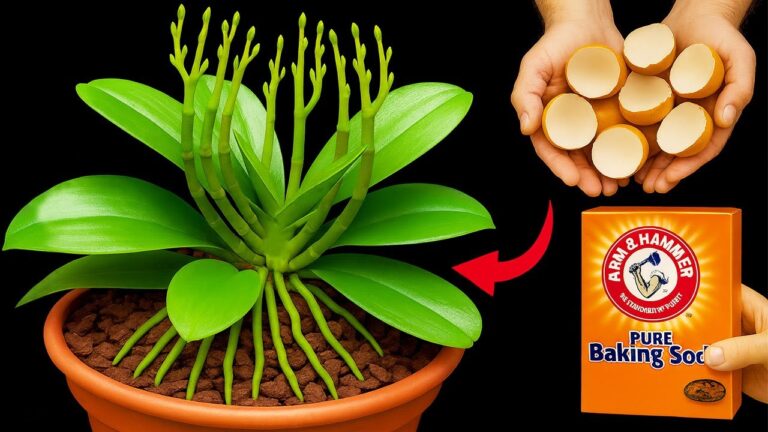
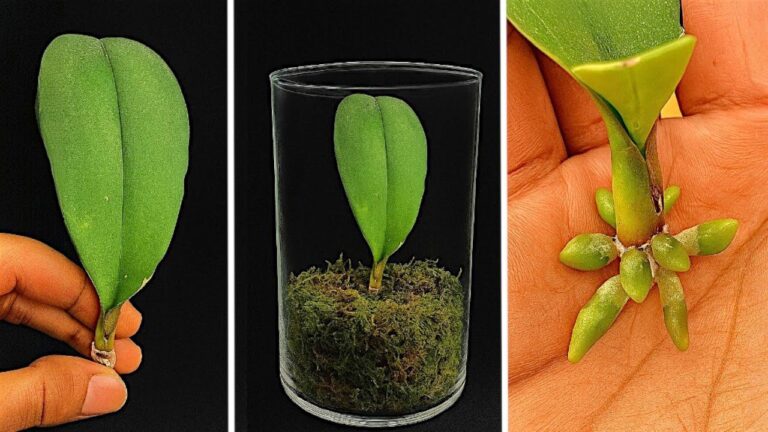
2. Prepare Your Floral Foam
Floral foam is an excellent medium for supporting the roots of your orchids. Follow these steps:
- Soak the floral foam in water for at least 30 minutes to ensure it’s fully saturated.
- Cut the foam into appropriate sizes to accommodate your orchid cuttings.
- Insert the cuttings into the foam, ensuring they are secure and upright.
3. Maintain Proper Conditions
Creating the right environment is crucial for your orchids to thrive. Here are some tips:
- Provide indirect sunlight by placing your orchids in bright, filtered light.
- Maintain humidity levels around 50-70% for optimal growth.
- Regularly mist the cuttings to keep the foam moist, but not soggy.
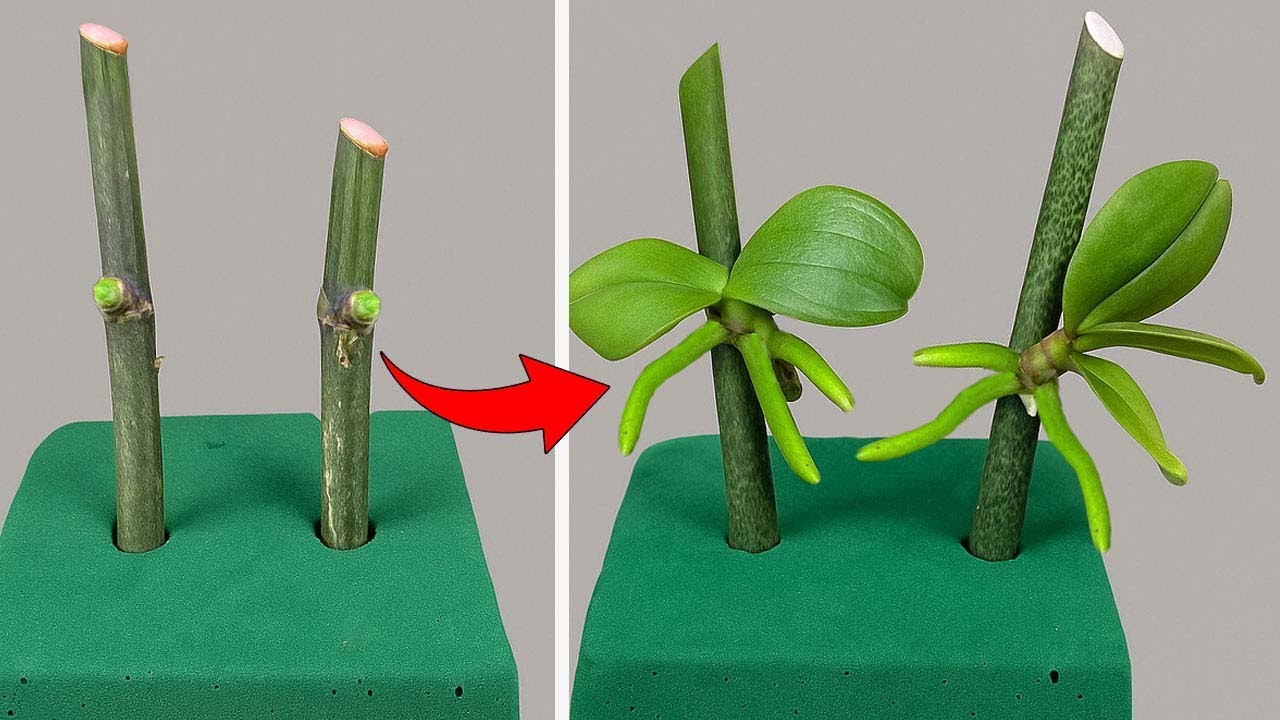
4. Monitor Growth Closely
Patience is essential in the propagation process. Keep an eye on your orchids for signs of growth:
- Look for new roots emerging through the foam.
- Check for leaf development to assess overall health.
- Be vigilant for any signs of disease or rot.
Common Mistakes When Propagating Orchids
While propagating orchids with floral foam can be straightforward, several mistakes can hinder your success. Avoid the following:
1. Overwatering
Using floral foam can hold moisture for an extended period. Ensure you don’t overwater your orchids, as this may lead to root rot.
2. Selecting Poor-Quality Foam
Always choose high-quality floral foam. Low-quality foam might not support your orchids adequately, resulting in weak growth.
3. Neglecting Light Requirements
Orchids require indirect sunlight. Placing them in direct sunlight can cause overheating and damage the plants, so be cautious.
4. Ignoring Pests
Keep a watchful eye out for pests. Regularly inspect your orchids and the foam for any signs of infestations, treating them promptly.
FAQ
Q: How long does it take for orchids to propagate using floral foam?
A: Generally, you can expect to see root growth within a few weeks, but it may take several months for full establishment.
Q: Can I use regular potting soil instead of floral foam?
A: While potting soil can work, floral foam provides better support and moisture retention for orchids during propagation.
Q: What should I do if the foam dries out?
A: If the floral foam dries out, gently mist the cuttings to restore moisture without soaking them completely.
Conclusion
Propagating orchids with floral foam offers a unique way to grow new plants with ease. By following essential tips and avoiding common mistakes, you can nurture a vibrant garden filled with these beautiful flowers. What strategies have you found effective in your orchid propagation efforts? Feel free to share your experiences in the comments!