10 Simple Steps to Create Your Own DIY Spiral Potato Cutter at Home
DIY Spiral Potato Cutter: A Step-by-Step Guide
- Introduction
- Required Materials
- DIY Spiral Cutter Steps
- Practical Tips for Usage
- Common Mistakes to Avoid
- FAQ
- Conclusion
Introduction
Have you ever wanted to impress your family or friends with beautifully spiral-cut potatoes? Whether for a special dinner, a casual gathering, or even as a fun project with kids, creating perfectly spiraled potatoes can elevate any meal. However, traditional tools may not give you the creative freedom you desire. You might find yourself facing challenges, but the good news is that making your own DIY spiral potato cutter at home is simpler than you think. Stay with us to discover how you can accomplish this!
Required Materials
Before diving into the creation process, it’s essential to gather all necessary materials. This will ensure a smooth and efficient project without interruptions. Here’s what you will need:
- Wooden dowel (around 1-inch diameter)
- Sharp knife or a mandoline for cutting
- Drill with drill bits
- Two bowls (one for holding the potato, another for scraps)
- Sandpaper for smoothing edges
- Safety goggles to protect your eyes
- Potato (of your choice)
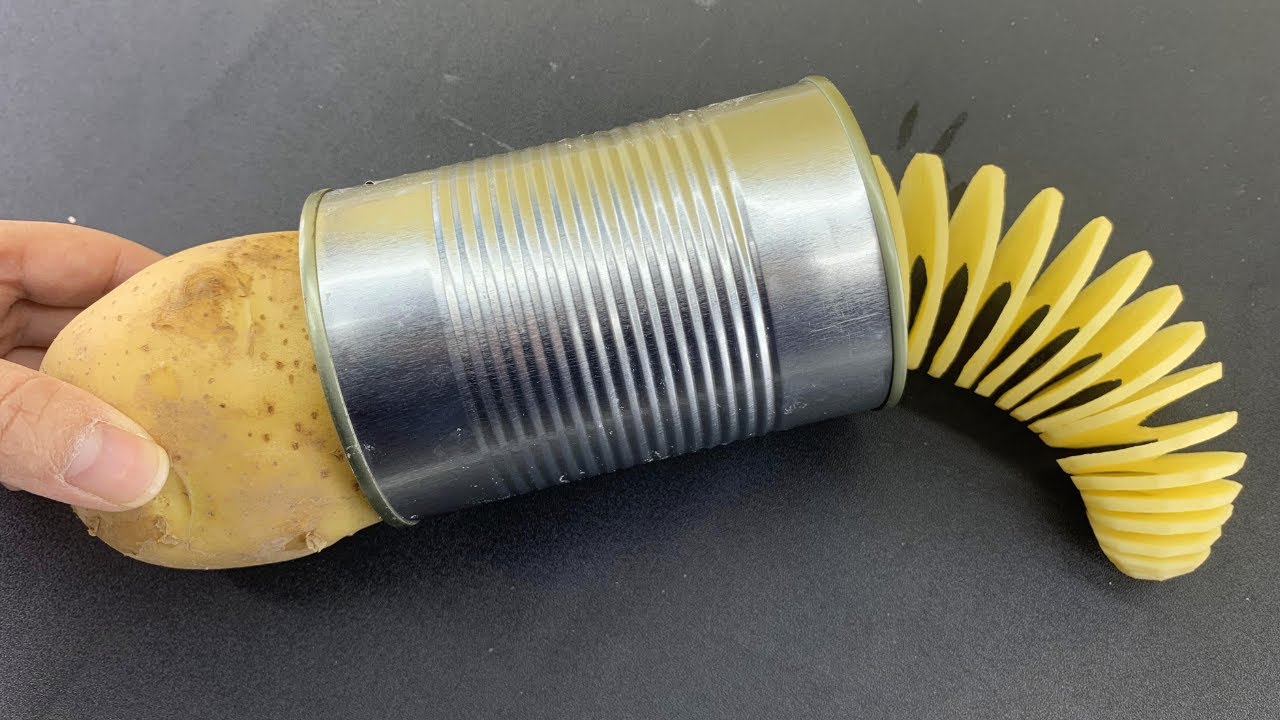
DIY Spiral Cutter Steps
Creating your own spiral potato cutter can be a rewarding project. Follow these clear steps to craft your own tool:
- Select your desired size for the wooden dowel. Aim for a length of at least 12 inches.
- Drill a hole through the center of the dowel to fit a skewer or stick you’ll use to hold the potato.
- Attach the dowel to the skewer, making sure it is stable and secure.
- Cut a potato in half to create a flat surface, making it easier to spiral.
- Insert the half potato onto the skewer and secure it tightly in place.
- Hold the dowel with one hand and twist the skewer with the other to create spirals.
Creating the Spiral
By twisting the skewer while holding the dowel, you should see beautiful spirals form. Adjust your speed for thicker or thinner cuts.
Final Touches
Once your potato is spiraled, you can either fry them immediately for crispy snacks or prepare them for baking. Make sure to place your spiraled potatoes in a bowl of cold water to keep them fresh until you’re ready to cook!
Practical Tips for Usage
Now that you have your DIY spiral potato cutter ready, here are some practical tips to maximize its effectiveness:
- Experiment with different types of potatoes for unique textures and flavors.
- Slice your potatoes evenly for more uniform spirals.
- Customize your tool by painting or decorating the wooden dowel.
Common Mistakes to Avoid
When crafting your DIY spiral potato cutter, be aware of these common pitfalls:
- Not ensuring the skewer is securely attached, which may cause accidents while cutting.
- Using overly soft potatoes, which can break easily during spiraling.
- Skipping safety precautions, such as not wearing goggles while drilling.
FAQ
What type of potato works best for spiral cutting? Starchy potatoes like Russets work best because they hold their shape during cutting.
How do I clean my DIY spiral potato cutter? Simply wipe down with a damp cloth and ensure all food particles are removed.
Can I use this cutter for other vegetables? Yes, other firm vegetables like zucchini or carrots can also be spiralized!
Conclusion
Making your own DIY spiral potato cutter at home is not only a fun project but also a practical addition to your kitchen tools. With a few simple materials and steps, you can enjoy beautifully spiraled potatoes for any occasion. What recipes do you plan to create using your new tool?