Create 2 Drawer Organizer Box: 5 Simple Steps for Ultimate DIY Storage Solutions
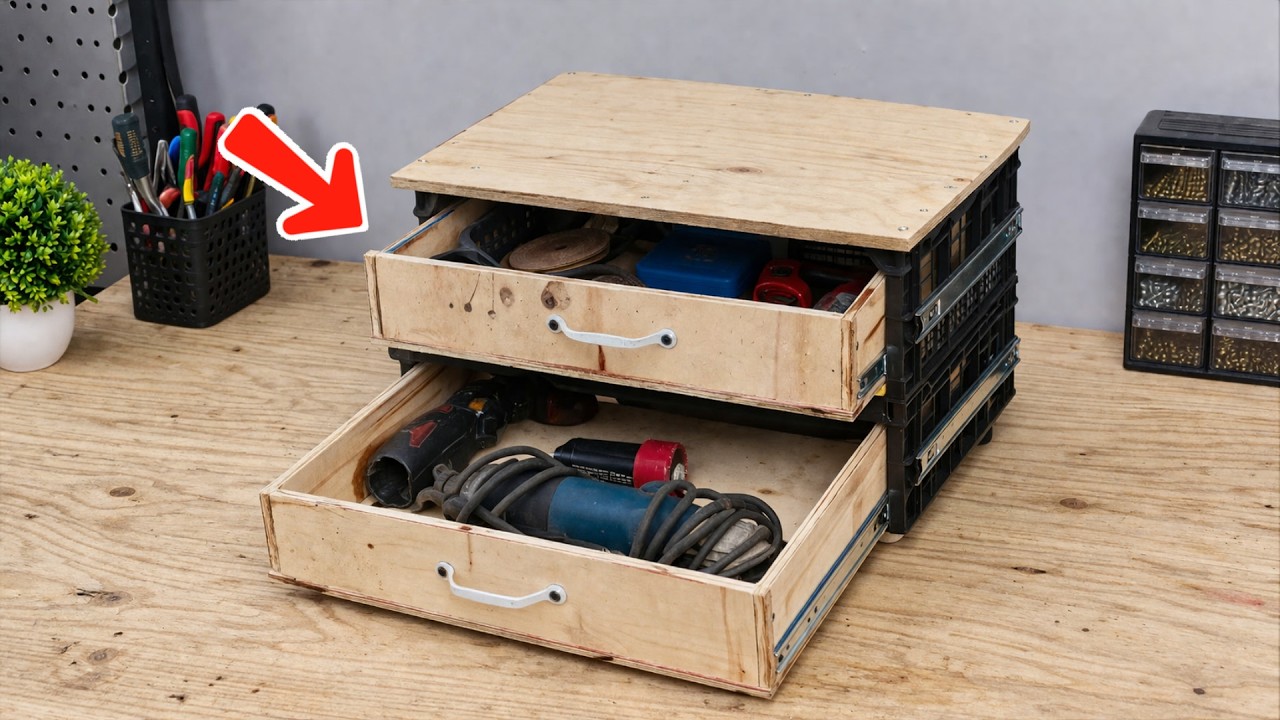
Create a 2 Drawer Organizer Box: 5 Simple Steps for Ultimate DIY Storage Solutions
Introduction
Have you ever searched high and low for that one small item, only to find it lost in a jumble of clutter? It’s frustrating and often leads to wasting valuable time. With a little creativity and some basic materials, you can transform your space into a well-organized haven. By creating a simple yet effective 2 drawer organizer box, you can keep your items neatly stored and easy to access. If you’re eager to learn how, keep reading.
Required Materials
Before starting your project, gather these essential materials to ensure you have everything you need to build your 2 drawer organizer box.
- Wooden boards (plywood or MDF)
- Screws (1 1/4 inch screws are ideal)
- Wood glue
- Sandpaper (medium and fine grit)
- Paint or wood stain (optional)
- Drawer knobs
- Measuring tape
- Power drill
- Saw (hand saw or circular saw)
Step-by-Step Guide
Now, let’s dive into the process of crafting your 2 drawer organizer box. Follow these simple steps to create your storage solution.
1. Measure and Cut the Wood
- Measure the dimensions of the space where you intend to place your organizer. A typical size for each drawer is around 10 inches wide, 8 inches deep, and 4 inches high.
- Cut your wooden boards according to these measurements. You’ll need two side panels, a back panel, a bottom panel, and two front panels for the drawers.
2. Assemble the Main Structure
- Attach the side panels to the back panel using wood glue and screws, ensuring they are square.
- Secure the bottom panel to the frame, allowing for a sturdy base.
3. Create the Drawers
- Cut the front and back panels for the drawers, making sure they fit snugly into the main box.
- Attach the side panels of the drawers, followed by the bottom panels.
4. Sand and Finish
- Sand the edges and surfaces of the organizer and drawers to avoid splinters. Start with medium grit sandpaper and finish with fine grit for a smooth surface.
- Apply your choice of paint or wood stain to add a personal touch, if desired.
5. Install the Drawers
- Insert the completed drawers into the organizer box.
- Attach drawer knobs to the front of each drawer for easy opening.
Common Mistakes to Avoid
When creating your 2 drawer organizer box, be mindful of these common pitfalls to ensure a successful project.
- Not measuring accurately: Double-check your measurements before cutting wood to avoid costly mistakes.
- Using the wrong type of wood: Choose a sturdy material suited for your project; lightweight options may not hold the weight of your items.
- Skipping the sanding process: Properly sanding your organizer can prevent injuries and improve the final appearance.
- Overloading the drawers: Stick to lightweight items to ensure the drawers function smoothly.
FAQ
What materials are best for a DIY drawer organizer?
Use plywood or MDF for durability and ease of handling.
How do I finish the wood?
You can use paint or wood stain to protect the surface and enhance its appearance.
Can I customize the size of the organizer?
Absolutely! Adjust the dimensions based on your specific space and storage needs.
Conclusion
Building your own 2 drawer organizer box is a rewarding way to enhance your home’s organization. With these simple steps, you can create a functional and stylish addition to your space. What will you store in your new organizer? Share your thoughts in the comments below!