9 Amazing Embroidery Tricks to Instantly Fix Holes and Enhance Your Style
9 Embroidery Tricks to Instantly Fix Holes and Enhance Your Style
- Introduction
- Trick 1: Simple Stitch Fixes
- Trick 2: Decorative Patches
- Trick 3: Monograms for Personal Touch
- Common Mistakes to Avoid
- FAQ
- Conclusion
Introduction
Have you ever found your favorite shirt or pair of jeans sporting an unexpected hole? It can be disheartening, especially if you love the piece. Instead of tossing it aside, consider using embroidery to breathe new life into your wardrobe. By incorporating some simple yet effective embroidery tricks, you can not only fix those pesky holes but also enhance your fashion style. Keep reading to discover how you can use embroidery to create stunning results.
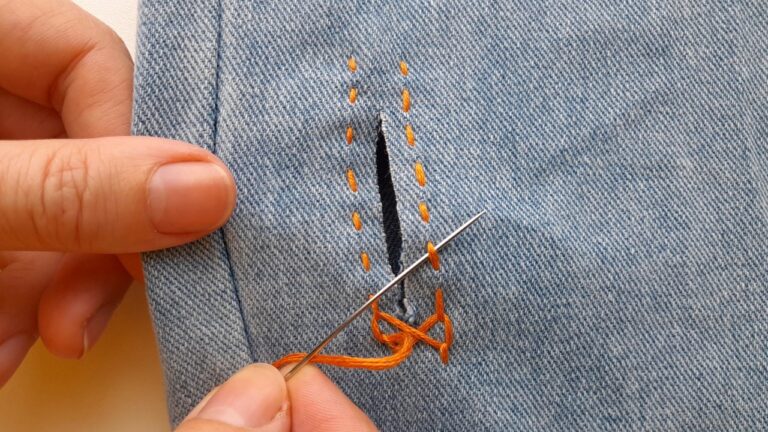
Trick 1: Simple Stitch Fixes
In many cases, a straightforward stitch is all you need to repair a hole. Here’s how:
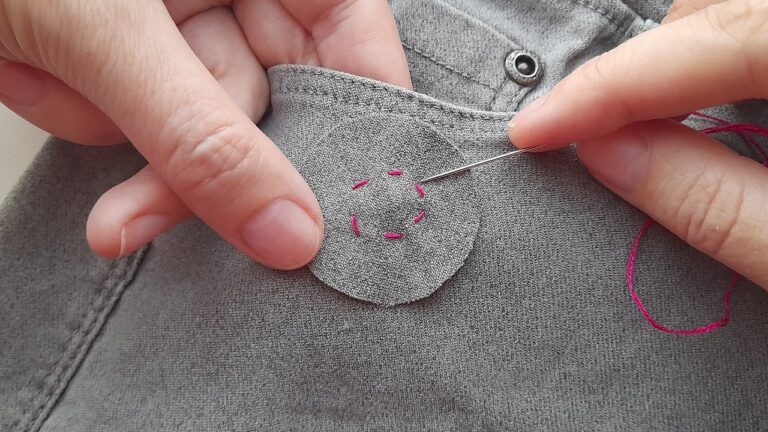
Step-by-Step: Basic Stitch Repair
- Gather your materials: a needle, thread matching your fabric, and scissors.
- Identify the hole’s edges and trim any loose threads around it.
- Insert the needle from the inside of the fabric to keep the knot hidden.
- Stitch over the hole using a simple running stitch, ensuring you secure the edges.
- Finish with a knot on the inside, and trim excess thread.
Helpful Tips
- Choose a thread color that closely matches your fabric for a seamless look.
- Practice on scrap fabric if you’re new to stitching.
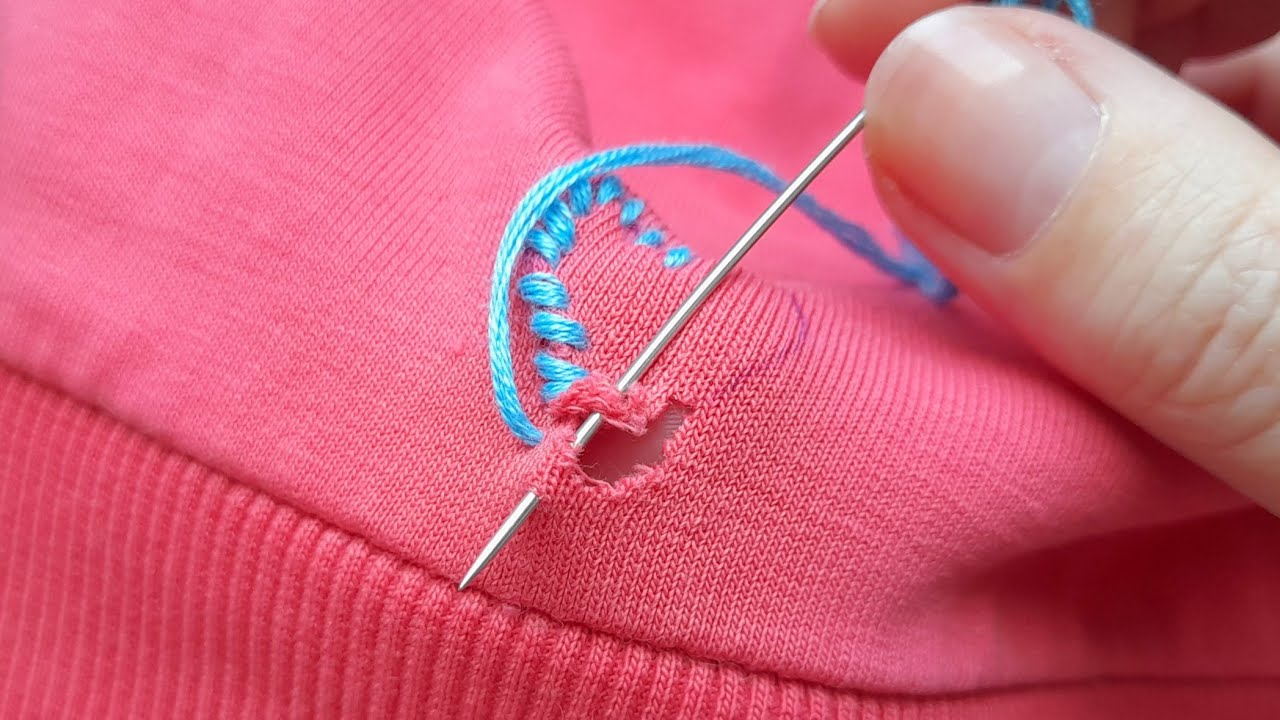
Trick 2: Decorative Patches
If you want to turn a repair into a style statement, consider using patches. Embroidered patches add personality to your clothing while effectively covering holes.
Types of Patches
- Iron-on patches for easy application.
- Hand-stitched patches for a handmade touch.
- Custom patches that reflect your unique style.
How to Apply a Patch
- Cut the patch to size, ensuring it covers the hole adequately.
- Position the patch over the hole, making sure it aligns perfectly.
- Secure it with either iron-on adhesive or hand stitches.
Trick 3: Monograms for Personal Touch
Monograms are a chic way to add a personal touch to your clothing while hiding imperfections. Making use of your initials or a special symbol can infuse new life into worn-out pieces.
Choosing Your Design
- Consider fonts and sizes that complement your style.
- Experiment with different thread colors for a vibrant look.
Steps for Embroidering a Monogram
- Prepare your fabric by ensuring it’s clean and wrinkle-free.
- Transfer your monogram design onto the fabric using tracing paper.
- Embroider over the design with your chosen stitches, such as satin or chain stitch.
Common Mistakes to Avoid
When embarking on your embroidery journey, it’s easy to overlook details that could negatively impact your results. Here are common pitfalls to avoid:
- Skipping fabric stabilization, which can cause distortion during stitching.
- Using the wrong needle size for your fabric, leading to uneven stitches.
- Neglecting to test stitches on similar fabric, which helps you avoid surprises.
FAQ
What materials do I need for embroidery repairs?
You’ll typically need a needle, embroidery thread, scissors, and a fabric stabilizer if required.
Can I use embroidery on any type of fabric?
Most fabrics are suitable for embroidery; however, lightweight or sheer fabrics may require special attention to avoid puckering.
How do I care for embroidered clothing?
It’s best to hand wash embroidered items in cold water to maintain the quality of the stitches and fabric.
Conclusion
By using these embroidery tricks, you can effectively fix holes while adding a distinctive touch to your wardrobe. You now have the tools to repair and personalize your clothing with ease. What are your favorite embroidery techniques? Please share in the comments below!