Revive Your Rootless Orchids: 5 Simple Steps for Strong Growth!
Revive Your Rootless Orchids with 5 Simple Steps for Strong Growth
- Understanding the Problem
- 5 Simple Steps to Revive Your Orchids
- Care Tips for Long-Lasting Orchids
- Common Mistakes to Avoid
- FAQ
Understanding the Problem
You may find yourself staring at an orchid that has lost its roots, leaving you puzzled about how to revive it. Rootless orchids can be heart-wrenching, especially when you’ve nurtured them with care. Understanding the reasons why your orchid has lost its roots is essential in ensuring strong growth and a vibrant bloom in the future. This article explores simple steps you can take to help your delicate plant recover. Read on to discover practical tips for revitalizing your beautiful orchids.
5 Simple Steps to Revive Your Orchids
Step 1: Assess the Damage
Before taking any action, it’s crucial to assess the state of your orchid.
- Check for any signs of rot or disease.
- Examine the leaves – look for wilting or discoloration.
- Identify the type of orchid you have, as care may vary.
Step 2: Prepare a New Potting Medium
Choosing the right potting medium is vital for your orchid’s recovery.
- Use a well-draining mix, such as bark or sphagnum moss.
- Avoid using regular potting soil, as it retains too much moisture.
- Consider adding perlite to enhance drainage.
Step 3: Potting the Orchid
When you’re ready to pot your orchid, follow these steps:
- Place the orchid in the new potting medium, ensuring the base is covered.
- Gently firm the mix around the plant to eliminate air pockets.
- Position the orchid in a location with indirect sunlight to encourage recovery.
Step 4: Watering and Humidity
Maintaining proper moisture levels is essential after repotting.
- Water the orchid lightly and let the excess drain away.
- Maintain humidity levels between 50-70% using a humidity tray or misting.
- Monitor moisture – avoid overwatering, which can lead to further issues.
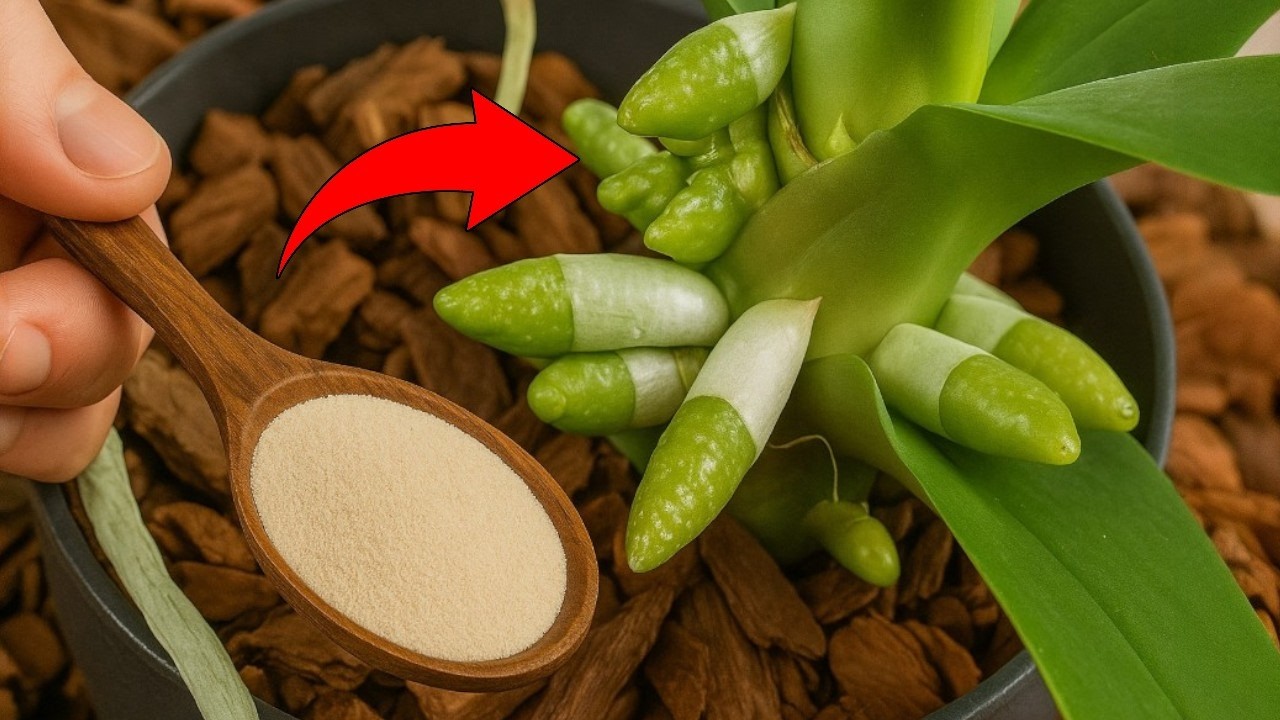
Step 5: Fertilization for Recovery
After a few weeks, consider fertilizing to boost growth.
- Select a balanced liquid orchid fertilizer.
- Dilute it to half the recommended strength initially.
- Feed every 2-4 weeks to support recovery.
Care Tips for Long-Lasting Orchids
Once your orchids start to show signs of recovery, here are some ongoing care tips:
- Provide bright, indirect sunlight for optimal growth.
- Keep them in a stable temperature range between 65°F to 75°F.
- Regularly check for pests and remove dead leaves to maintain health.
Common Mistakes to Avoid
Reviving rootless orchids can be a delicate process, with some pitfalls to watch out for.
- Overwatering is a common issue that can lead to rot. Always ensure the potting medium is dry between waterings.
- Using the wrong potting mix can stifle root growth. Stick to specialized orchid mixes.
- Providing too much direct sunlight can stress the plant. Ensure it receives filtered light.
FAQ
Q: Can I save an orchid with no roots?
A: Yes, with the right care, you can help a rootless orchid recover by following proper repotting and care techniques.
Q: How often should I water my revived orchid?
A: Watering frequency depends on the environment, but generally, every 1-2 weeks works well once the plant is stable.
Q: When should I fertilize my recovering orchid?
A: Fertilize about 4-6 weeks after repotting to promote new growth, using a diluted solution.
Conclusion
Reviving your rootless orchids requires patience, care, and understanding. By following these five simple steps, you can help your orchids regain their strength for a beautiful bloom. Have you tried reviving your orchids before? Share your experiences in the comments below!