7 Simple Steps to Sharpen Your Knife Like New in Minutes! Discover the Easy DIY Trick
7 Simple Steps to Sharpen Your Knife Like New
- Introduction
- Why Knife Sharpening is Important
- Gather Your Tools
- Step-by-Step Guide to Sharpening
- Common Mistakes to Avoid
- FAQ
- Conclusion
Introduction
Imagine you’re preparing a delicious meal, but your knife struggles to slice through vegetables, making the process frustrating and time-consuming. A dull knife not only slows you down but can also be unsafe to use. Fortunately, sharpening your knife is a straightforward task that can breathe new life into your kitchen tool. Let’s explore how you can easily restore your knives to their former glory without much hassle.
Why Knife Sharpening is Important
Keeping your knives sharp is essential for several reasons:
- Effortless Cutting: A sharp knife reduces the effort required when slicing, chopping, or dicing, making food preparation quicker and more enjoyable.
- Enhanced Safety: Contrary to popular belief, dull knives can be more hazardous. They require more force, which can lead to slips and accidents.
- Better Flavor: Using a sharp knife prevents bruising and damaging the cellular structure of fruits and vegetables, helping to maintain their flavor and freshness.
Gather Your Tools
Before you start the sharpening process, it’s crucial to gather the right tools. Here’s what you’ll need:
- Whetstone: A reliable whetstone is a must. You can choose a coarse side for dull blades and a fine side for polishing.
- Knife: Your knife, of course! Make sure it has a straight edge to ensure effective sharpening.
- Water: For soaking the whetstone and ensuring a smooth sharpening process.
- Towel: Keeping a towel handy will help you dry your knife and clean up any mess.
Step-by-Step Guide to Sharpening
Now that you have your tools ready, let’s dive into the process of sharpening your knife. Follow these simple steps:
Step 1: Soak the Whetstone
Begin by soaking your whetstone in water for about 10-15 minutes. This will help to lubricate the surface and make the sharpening process smoother.
Step 2: Position the Knife
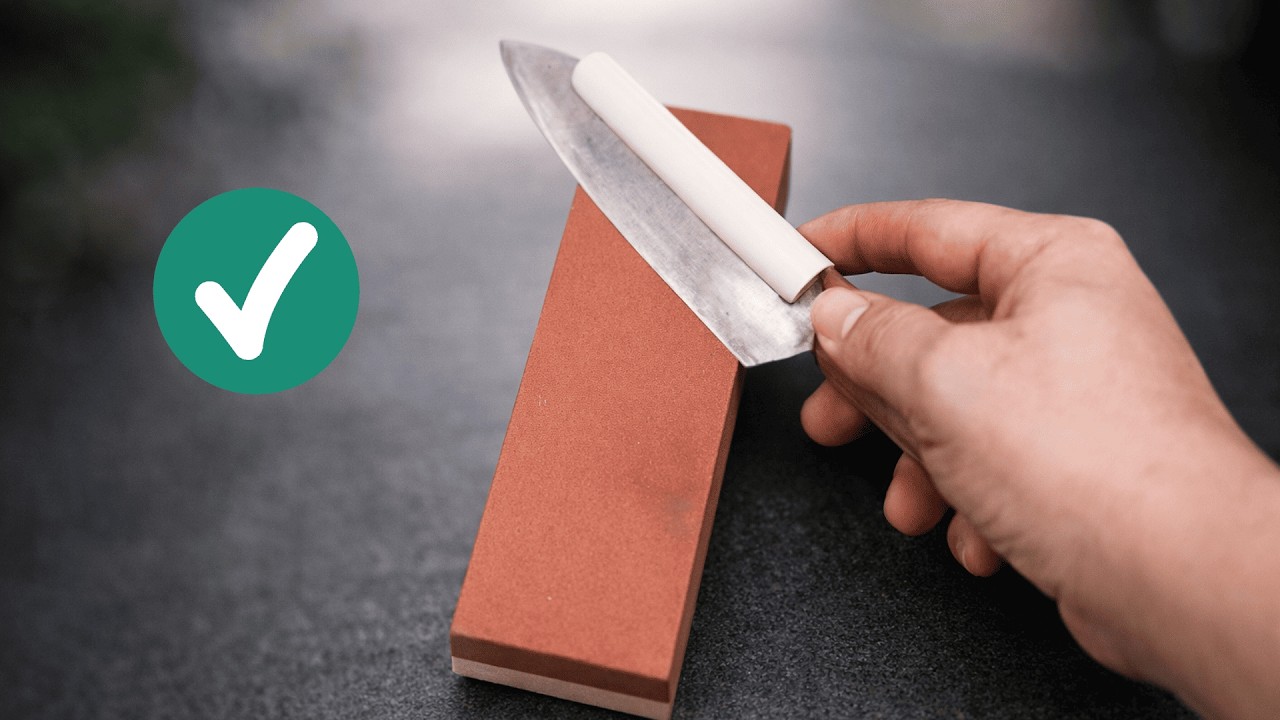
Hold your knife at a 20-degree angle against the whetstone. This angle is ideal for achieving a sharp edge.
Step 3: Start Sharpening
- Draw the Knife: Firmly push the blade across the whetstone from heel to tip in a smooth motion.
- Alternate Sides: Repeat this motion on the other side of the blade to create an even sharpness.
- Maintain Consistency: Repeat this process 5-10 times on each side, applying even pressure throughout.
Step 4: Wipe the Blade
After sharpening, wipe the blade with a towel to remove any metal shavings or debris.
Step 5: Test the Sharpness
To check if your knife is sharp enough, try slicing through a piece of paper. A sharp knife should glide through effortlessly.
Common Mistakes to Avoid
Even experienced cooks can make mistakes when sharpening their knives. Here are a few pitfalls to watch out for:
- Ignoring the Angle: Holding the knife at an incorrect angle can damage the blade rather than sharpen it.
- Skipping the Fine Side: Neglecting to use the fine side of the whetstone can lead to an uneven edge.
- Using Too Much Pressure: Too much force can create a rounded edge instead of a sharp point.
FAQ
How often should I sharpen my knife? It depends on usage, but generally, sharpening every few months is a good rule of thumb.
Can I use other methods to sharpen my knife? Yes, various tools like honing rods and electric sharpeners are available, although a whetstone provides the most control.
Is it necessary to soak my whetstone each time? While it’s recommended for optimal performance, you can also use it dry for quicker tasks, though it may be less effective.
Conclusion
Sharpening your knife is a skill that can greatly enhance your cooking experience. With just a few simple steps, you can keep your knives in excellent condition. What tips do you have for maintaining kitchen tools? I’d love to hear your thoughts in the comments!